Search This Blog

Monday, December 17, 2012

Elf on the Shelf --- Quick and Painless Ideas


If you have kids, then you may have heard a thing or two about Elf on the Shelf. It's the latest holiday craze that may drive you crazy. 

But, all the work is well worth it when you see that big smile or hear a tiny giggle as your girl or boy gets up every morning to search for the elf. (And, in my case, it speeds up the process of getting dressed in the morning so she can go on the scavenger hunt).

This is the first year we got our elf. The special  guest from the North Pole is named Snowflake (my daughter decided that with the help of her Grandma Dea Dea). Our elf is a girl through and through ... she's got earrings and a couture skirt. She also came with the Elf on the Shelf book and DVD movie.

So, here is a look at what Snowflake has gotten into this year. Some elves can be mischievous, but our little gal doesn't get into too much trouble -- thank goodness!

Here's a glimpse ...


DAY 1: 

Snowflake arrives with a message for my girl.


DAY 2:

Snowflake decided to hitch a ride with Elmo and the polar bears.


DAY 3:

This one was special because Snowflake helped put up the train and the tree while my little girl was sleeping! Such a good helper!


The picture above comes with a funny story. The train came off the tracks and my daughter kept yelling, "Something is wrong with the Elf!" She repeated this over and over, but I thought she was talking about the train derailment. I finally looked and a real bug was crawling on Snowflake! Poor elf couldn't tell us!

 Now, for all those who don't know the story behind the elf ... if you touch her, her magic will go away! I had to carefully, with toddler eyes watching every move, put a napkin against Snowflake's collar and the bug eventually crawled onto the napkin. No elves or bugs were harmed in this process ... I let the bug go free outside where it belongs!

DAY 4:

Snowflake is tired and opted for some relaxing TV!
(She found a television frame and a small remote that wasn't needed during the day).


DAY 5:

When my daughter saw the elf with the cooking utensils she yelled, "The Elf is baking!"


DAY 6:

Our elf likes fishing in a mason jar with a pencil and toy fish. 
She colored the water with food coloring and also left some goldfish snacks (in a snack cup -- not in the water) for my daughter.


DAY 7:

Snowflake is checking out the Christmas decorations!


DAY 8:

Weeeeeeee ... our adventurous elf is zip lining to the Christmas tree! 


DAY 9:

The elf is potty training with Elmo's potty. I think she used a little too much TP! 
She looks guilty in the pictures!


DAY 10:

Snowflake wanted to be the star or angel on our tree for the day.


DAY 11:

Every gal likes getting "dolled" up once in a while! 


DAY 12:

It's been twelve days of the Elf ... time for some much needed rest in the guest bedroom (with a pillow case used as a blanket). She even left a message!


DAY 13:

Snowflake isn't afraid of heights ... for sure! 
This time she was in the chandelier.


DAY 14:

It looks like Snowflake tried to do a snow angel in the sugar, but gave up.


DAY 15:

Yee-haw! She was found wearing cowboy boots and even had a twine lasso! Next time, I think she should invite the Toy Story folks (Woody, Jessie and Bullseye).


DAY 16:

And the Emmy goes to .... Snowflake! She left behind a quick speech too! 
(If you don't have an Emmy around the house, maybe the elf can make an award.)


DAY 17:

Even elves have to do some work sometimes. 
Santa's train broke down, so she grabbed the toy tools and got to work. She's so handy around the house!


DAY 18:


This elf got a little thirsty from trips to and from the North Pole. Look -- she turned the milk green with food coloring! Snowflake didn't mind the cold temps in the fridge, but my little girl didn't want anything to do with green milk! Oh well! 


DAY 19:

 I wish I had this kind of help all year long! Snowflake grabbed some toy scissors and helped cut coupons! Wouldn't that be great if she could do this every night!


DAY 20:

Snowflake loves to eat too! We found her in the toy deli grabbing a bite to eat. She chose pizza, cake and lemonade and paid with a credit card -- I'm guessing she'll expense these purchases with Santa. 

I hope she used the coupons she cut too -- times are tough!


DAY 21:

Our goofy elf decided to have a little fun on day 21. She got into the foam stickers! What a mess!


DAY 22:

Weeeeeeeeee!


DAY 23:

The next one was fun! Snowflake put signs around the house pointing to the car. She was strapped in for a ride to a Christmas party! She was, of course, hanging in a place where little hands couldn't touch her during the ride.


DAY 24:

Snowflake got creative. She hopped in the toy wagon with Santa Elmo and a bag full of toys. Rudolph is, of course, leading the way back to the North Pole!


I think we did alright for our first year with an Elf on the Shelf. I'm not gonna lie, I kinda miss our little red dressed magical gal. 

I hope this blog gives you some quick and easy options -- especially for those nights where you are exhausted after eating cookies and drinking a little egg nog!

Feel free to pin my pix for inspiration on Pinterest!

Enjoy!

Kathryn 


Follow Me on Pinterest

Sunday, December 2, 2012

Cost Cutting Christmas Ideas

Happy Holidays!

We all know the holidays can put a big dent in your bank account, so I searched Pinterest for some easy (and cheap) ways to make a few gifts without looking like a penny pinching Grinch! 

In other words, hopefully the recipients will think you're giving them a nice little keepsake instead of looking like a Christmas cheapskate. 

Here's what I came up with -- snowmen/women ornaments and candy bar socks! Keep reading to find out how to make these -- they are super easy and very cute (if I must say so myself)!


Snowmen Ornaments

(Click here for the original idea/website)

What You'll Need:

Ornaments with "snow" (see description below for more info)
Acrylic Paint (white and orange)
Paint Pens (black, red, green, blue, yellow)
Ribbon
Clear Acrylic Gloss Coating (Spray Can)
Wet Paper Towels to clean fingers
Toothpicks
Paintbrush 


I bought the ornaments from Hobby Lobby. 
They already have the filler balls inside and best of all -- they are plastic! The original cost was $6.99 for a box of four, but they were 50 percent off!! Yay! 
So, it comes down to costing 87 cents EACH!

1. Once you have all your supplies handy, start with painting fingers white. My young daughter helped me out and I had her keep her painted fingers in the air while I switched to the next ornament. Just paint the inside of the finger (not the complete tip of the finger -- just the inside).

*** Be sure to think ahead of time how many snowmen/women you want on each ornament (i.e. I did three to represent our family and changed it up for others).

2. Once the white dries, you can start adding hats and ear muffs with the paint markers (start at top and work your way down).


3. For the nose, I took the fantastic advice from the original website. I used a toothpick to dab a dot of orange and dragged the paint to the right to create the pointed noses. It worked great!


4. Add the coal mouth/buttons and some personality to your little snowmen/women (like scarfs). It's also nice to put the date and/or the family name ... etc.

5. After the paint is completely dry, take the ornaments outside and spray them with the gloss coating. The reason I did this is because the paint seems to easily scratch (which is nice when you mess up), but I wanted to protect the final snowmen/women for years to come. Make sure your ornaments are dry before spraying, otherwise the paint will smear which is NOT a pretty site!! 


6. Last but not least, add ribbon and hang (or wrap for a present). Easy peasy!


Candy Bar Socks Gift

What You'll Need:

Socks
Candy Bars (I used Hershey)
Ribbon
White Paper (I used the paper that comes with a new scrapbook)
Markers
Double Sided Tape


1. Cut the white paper to fit the candy bars.
2. Put double sided tape on the paper and tape to candy bar. Add another piece of tape on the other side to seal the white paper.
3. I folded the socks in half and tucked the foot of the socks behind the candy bar. Add ribbon  around the folded sock and make a bow.
4. Add double sided tape to the inside of the socks to keep them in place.
5. Draw on the snowmen faces and you're done!


I mean ... who doesn't like comfy socks and chocolate!


My very own inexpensive Christmas decorating ideas

Stockings:


I made these stockings years ago, but I'm sure you can still find these supplies at the craft store. Basically, you buy the stockings with nothing on them, wooden letters (I painted green) and sew on some charms (also found at craft store).


Mason Jars:


I got a great deal on mason jars last year, so I love to decorate with them at any opportunity. For the above decor, I put some straw like filler inside and tied some twine around the top. Then, all you have to do is add some real or fake pine to the jar.


Here's another look at the same idea, but I added battery operated Christmas lights to the biggest jar (which are not lit in the picture -- sorry). 


The jars above have epsom salt inside (which sparkles like snow) and I melted a candle on top.

** I bought the bags of epsom salt at Walgreens near the pharmacy -- I got the plain, no smell kind.


Felt Bags:


These adorable felt bags play several roles in my house. They are nice and festive around the tree, great for saving on wrapping paper and you can re-use them every year!!

These are sold at Michaels, but wait for them to go on sale! I got them on Black Friday for a few bucks each (originally $4.99 each). I'm sure you can find them even cheaper right after the holidays to save for next year.

These bags saved me on tape and wrapping backache. They are also easier for the younger kids to get into their presents and you end up with less trash on Christmas day! It's a no brainer!

I hope you enjoyed this festive blog to get you in the holiday spirit without spending too much! 

Feel free to pin my pix!

Kathryn 


Follow Me on Pinterest

Monday, October 22, 2012

"Pain" Free Medicine Cabinet

After moving into a new house, I quickly realized how much of a "pain" it was to find a place to organize our medicines. I don't have much room in the bathroom and I also needed something that was easy to get to, but not too easy for a toddler!

So, I thought outside of the medicine cabinet and headed to good ole Target. Here's how I "spiced" up my hallway closet. I used spice racks!


I got two adjustable spice racks that turn around like a lazy susan ($15.89 each) ... one holds adult medicine and other is for children. That way, in the middle of the night, you're not fumbling around for meds during an emergency. With this method --- you know exactly where to look!


Also at Tar-jay, I bought a large three drawer container ($12.49) so I could separate all the different types of medical stuff you may need (cold/flu, first aid/misc. and strep tests/pain medication).

The container didn't come with a labeling option, so I went to Staples and got the Martha Stewart sticky bookplates ($4.99). I loved these because as your needs change, you can easily change what you want to keep in each drawer!

And, of course, I had to make a few safety changes to the door (see below). In order to keep my little girl out, we ended up adding a safety door knob too!


Total cost of this project = $50.00 

I know a medicine cabinet could cost less, but I feel like you can put a lot more medicine on the spice racks and in drawers than in a cabinet. I also like how it's all in one place too!

Enjoy!

Kathryn 
Follow Me on Pinterest

Monday, August 27, 2012

Coupon Class (Cliff Notes)


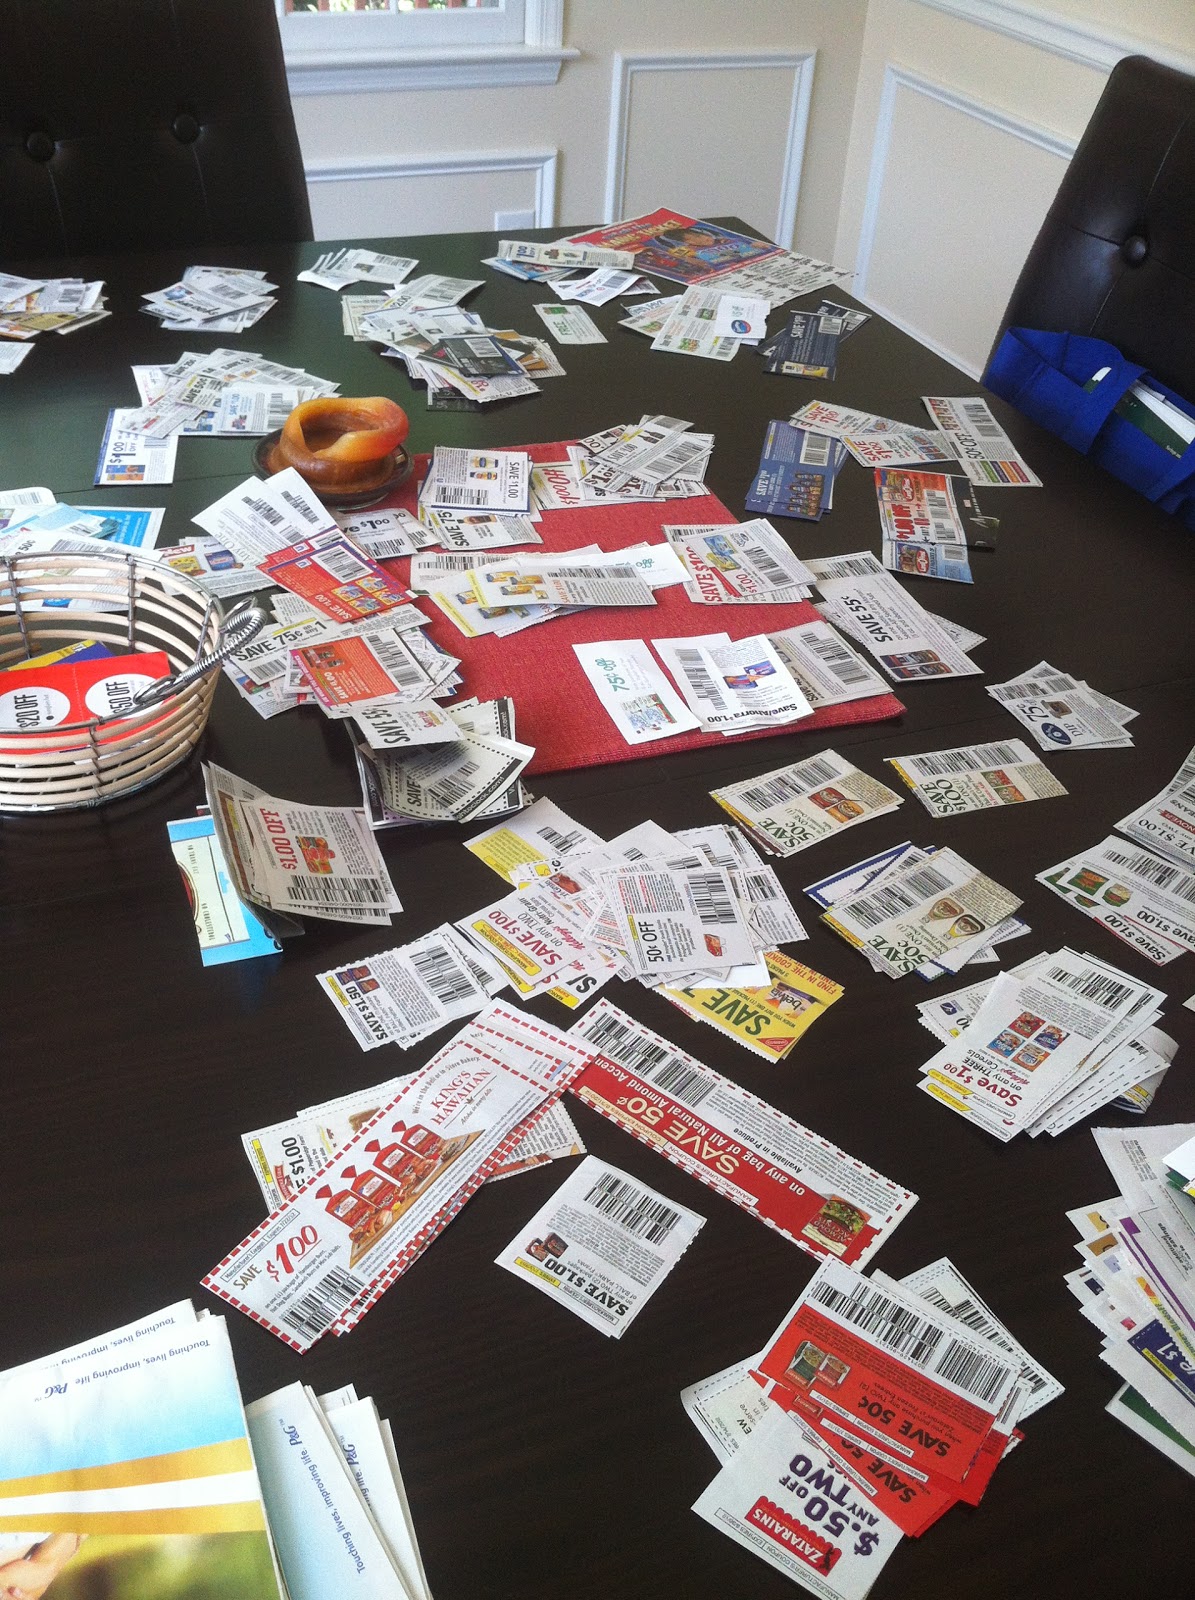
At any given moment, my dining room table looks like this ...


Yes, couponing takes time, patience and good scissors, but once you start getting freebies, all that hard work is well worth the clipping! 

After all, each and every piece of paper you see in these pictures equals free MONEY! 


As your first lesson (especially for those who are not coupon believers), let's take a look at what stuff you can get for nothing and/or pennies.

In fact, why don't we start with my favorite coupon picture below. 

To the left you will see Cover Girl eyeshadow and blush and to the right, you will see the dollar bills Kroger GAVE me to take the make-up out of the store. That's right, I made more three dollars and change with six coupons! Yay! I couldn't believe it when the cashier handed me money back (not all stores give money back so you need to check your store coupon policy)!!


So "class" ... do I have your attention now? If not, take a look at the next pictures. I got all these for FREE (or close to free)!  I'm not bragging to show off, I'm telling you this to get you excited about saving money ... are you there yet?


Yep, got all the above for free!  

The body wash and deodorant were free from combining Publix coupons with manufacturer coupons on each item. The advil was in the travel section and the coupon didn't exclude travel items. 


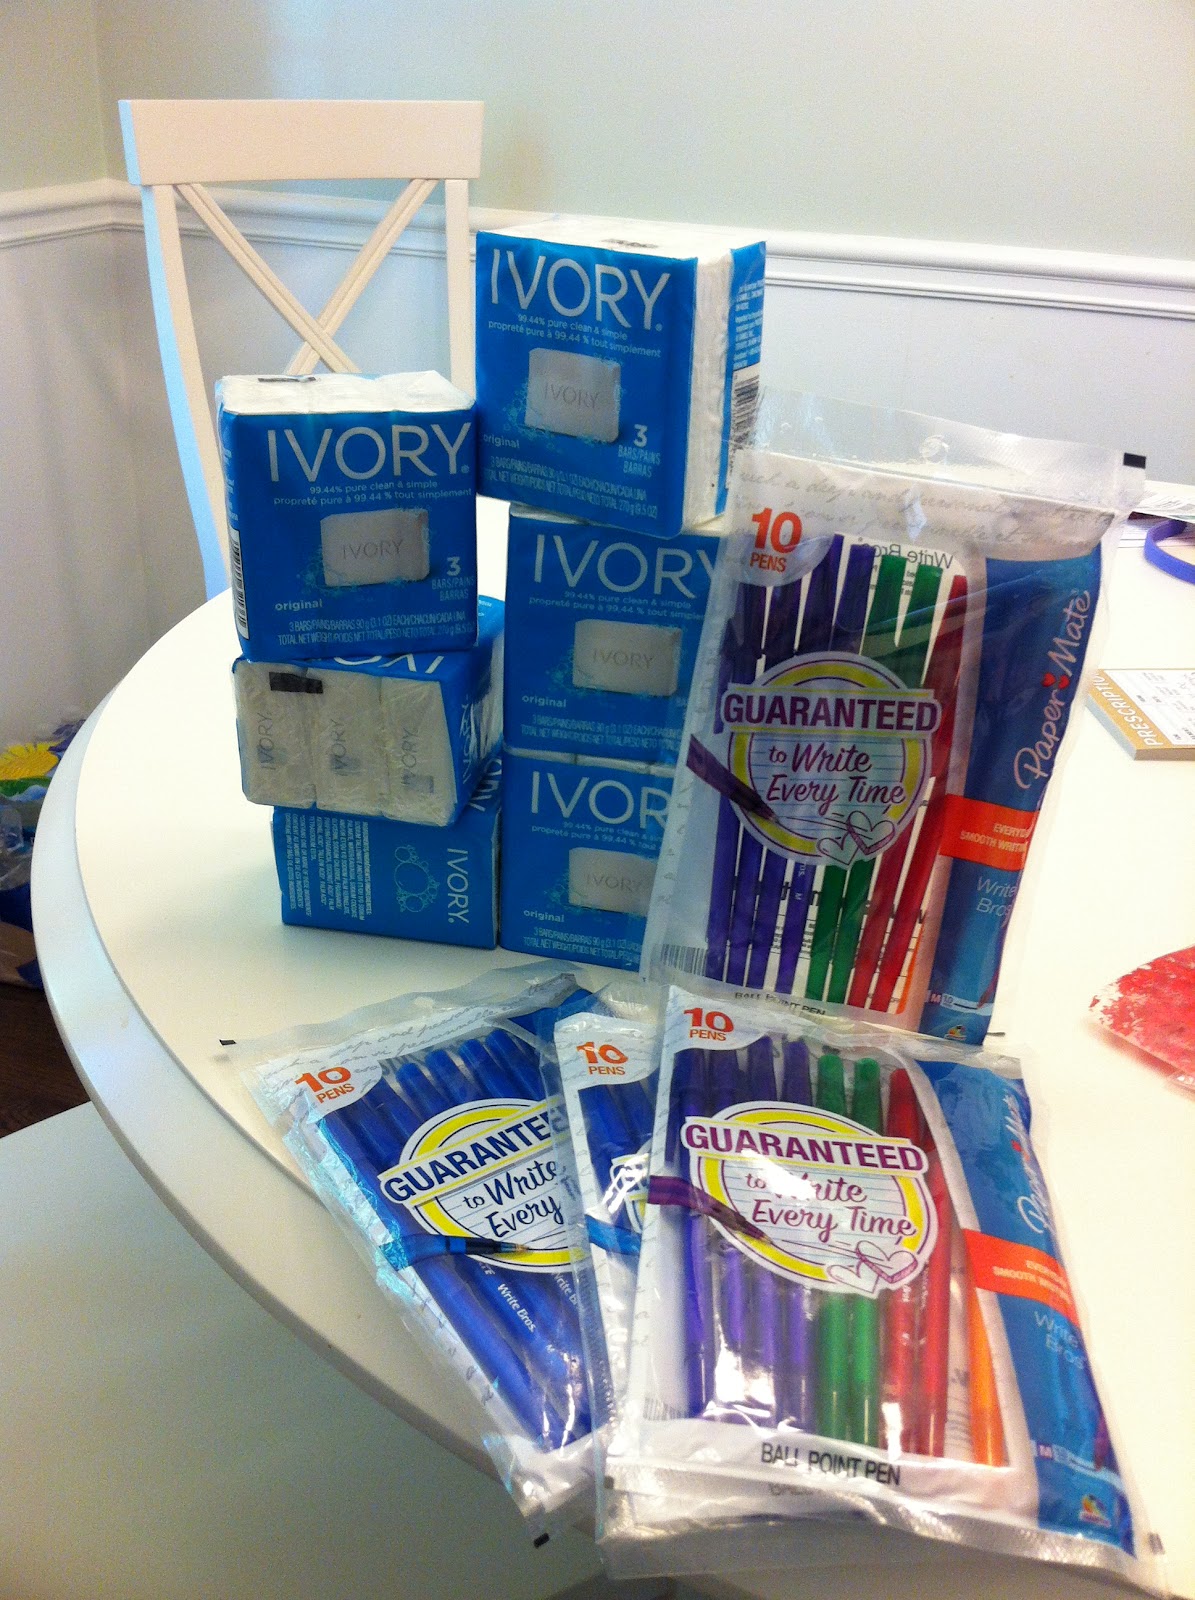
I didn't pay anything for these 18 bars of soap and 40 pens! The soap was a dollar deal at Kroger and I had 50 cent coupons which doubled. I got the pens at Target with a dollar off printed target.com coupon (the pens were on sale for 97 cents).


And ... I got all the above loot for 14 cents between three stores on the same day. Some of the crayons, toothpaste, razors, pens and feminine products will be donated to charity. I have a stockpile, but not like the ones you see on TV ... I'm not THAT extreme (yet).

NOW, to the good stuff ... how do you save money? 
First, you need to learn how to get coupons...


Where to find coupons?

  • ·        Newspapers, magazines, store card eCoupons, Facebook and email ads (when you sign up for company emails)
  • ·        “Peelies” or flyers on store shelves or in the front of stores (look for rebates too)
  • ·        Buy from people online (EBAY) ---- Never pay for printable coupons due to fraud … only buy the actual coupons
  • ·        Printable coupons you can find on websites (i.e. Target website)
  • ·        “Catalina” Coupons – printed at register after you pay


What you need to ask store employees?

  • ·        Does your store double or triple coupons? How much? What days/times?
  • ·        What kinds of coupons are accepted? (manufacturer, printable, eCoupons on your preferred card … etc.)
  • ·        Do you take competitor coupons? If so, what kind? Some stores have a piece of paper at the customer desk with the list of what competitor coupons they take ---EVERY store is different!! So, one Publix could take coupons from four different competitors and the Publix down the road may only take two or none.
  • ·        May I use a store coupon along with a manufacturer coupon on ONE item? Most Publix and Target stores allow you to use a store coupon AND manufacturer coupon on a SINGLE item – you can double up on the savings on one item!
  • ·        If you run a BOGO (Buy One, Get One) sale, can I use a coupon for both items? Publix has BOGO’s all the time. My store allows me to use a coupon for each item, including the free one, so it’s like using TWO coupons on one product while getting the other for FREE!
  • ·        When you advertise 10 for $10 – do I have to buy 10 to get the product for a dollar? Most Kroger and Publix stores don’t make you buy 10 to get the $1 deal – this is GREAT if you have a 50 cent manufacturer coupon that will double to $1 = FREE!
  • ·        Does your store have coupons you can find around the store? If so, where? My Publix has Advantage Buy flyers (one green and one yellow) at the entrance. These flyers have Publix and manufacturer coupons inside – grab a few when you go in because you may need them later!


Extra questions once you get the hang of couponing:

  • ·        Do you limit how many coupons I can use per transaction?
  • ·        Do you exclude any coupons? (BOGO offers, free product coupons … etc.)
  • ·        Do you match competitor prices if I bring in the ad? Most Wal-Mart and Target stores match competitor prices.
  • ·        Do you take Internet printable coupons? Can they be printed in black and white?
  • ·        What is your policy on overage? Some stores give you money back if your coupon is more than the product costs. So, if you are buying more stuff, then it can go toward the rest of your bill.


Interesting info about couponing/coupons:

  • ·        One coupon per purchase means per item purchased (not per transaction)
  • ·        Look for the #5 at the beginning of coupon barcodes – that means the coupon has a potential to double (but, even if  you don’t see #5 it could still double). If you see a #9 – can’t double
  • ·        Depending on where you live, you may be able to find a Publix “Mystery” Coupon in the newspaper. This coupon is ONLY good for that day and you must spend at least $10 to get the mystery item for a penny. The penny item can be anything from Publix sweet tea to toilet paper, bleach, cookies or cheese. Click here for more information from my earlier blog.
  • ·        Use technology! Kroger has an app where you can load coupons onto your store card!! Michaels, Jo-Ann’s and Hobby Lobby craft stores have apps with coupons and all you have to do is show them the coupon on your phone to get the discount.
  • ·        Smaller sizes of some products can be cheaper than the bigger sizes … do your math!
  • ·        If your store is out of a product and you still want the deal – ask for a rain check! A lot of places allow this, so when they re-stock (even after the deal is over) you can get it with your coupons. Just make sure the cashier knows you have a rain check before checking out.
  • ·        If you’re not into dumpster diving, ask neighbors for their coupons or ask the stores, schools or nursing homes what they do with left over papers.
  • ·        Just because the coupon says “Kroger” on it doesn’t mean it can only be used at “Kroger” … if it says “Manufacturer Coupon” on it then it’s fair game!


How should you organize your coupons?

  1. ·        If you have the time to cut them out, baseball card protectors are great to use in a notebook. You can make sections for food, baby stuff, household items … etc. The good thing about this is that you can grab your notebook and go, the bad part … it takes a lot of planning!
  2. ·        When you get the coupon newspaper inserts (RedPlum/SmartSource), write what day it is on the cover page. This helps if you use websites that tell you what date the coupons came in the mail (see #2 below).
  3. ·        If you get multiple identical inserts, some people staple the like pages together and cut the coupons when needed.

There are also great I-phone apps and websites out there ...


Apps: Coupon Sherpa (mostly retail), RetailMeNot, Kroger (load coupons), Publix (ad), Michaels, Jo-Anns, Hobby Lobby and Card Star (put all your store cards on this one App).

I'm a BIG fan of "The Coupon Mom" (Stephanie Nelson). Her website
is a one stop shop to find great deals and freebies. It is loaded with information about where to find the coupons and even links you to printed coupons. I LOVE this site and use it at least three times a week!


So, I hope this class was well worth your time (and you didn't even need a coupon to get it for free)! Feel free to ask a question or two in the comment question.


Enjoy!


Kathryn


Follow Me on Pinterest

Saturday, August 18, 2012

Save Your Shower!

There's nothing like showing off your dirty laundry (or in this case, dirty shower) to the world! 

Here's a warning for those with mildew/mold phobia ... it's grimy, it's slimy and it's just plan gross!


Yucky, huh??!! 
(Our shower doesn't have the greatest air flow and 
I've tried scrubbing, but it messes up the caulk to much!)


I'm sure this sort of stuff happens behind shower curtains and doors across the globe (only a few of us will actually blog about the issue). 

And if it weren't for "This Blessed Life" blogger and Pinterest ... it's sad to say, but my shower would still be disgusting. The beautiful thing about Pinterest and bloggers ... we all share great ideas and this is one of them!

Here's a sneak peak of the before and after ....


What you need:

Bleach
Salon cotton (for perms)
Aluminum tray
Q-tips (optional)


I found the salon cotton box at Sally Beauty Supply for $3.19 and still have some leftover for the next time my shower gets the cooties. I already had bleach on hand (got a big jug of the bleach at Publix for a penny -- see earlier blog about the mystery coupon). And, I found the aluminum tray and Q-tips around the house.

*** Make sure you have good ventilation in your bathroom. I plugged in a fan, opened the bathroom window and shut the door when I was done!

1. Soak the cotton strips in the aluminum tray with bleach. I cut them in smaller pieces so it wouldn't be so messy when putting them in place. I left the ends of the cotton out of the bleach because I hate getting bleach on my hands! 

2. Put the bleach soaked cotton in the areas that need cleaning. I used Q-tips to push the cotton closer to the wall.

3. Let sit for at least eight hours. 

4. Take off the cotton strips and smile!


 More AFTER pictures ...


Total cost of this project = $3.20

That's a deal considering I wanted to rip the shower and tub up and start over!

Enjoy!

Kathryn


Follow Me on Pinterest

Friday, August 17, 2012

DIY Bow Holder

Let's face it ... most girls like their accessories!!

When you have a girl you tend to acquire bows and hair clips of all different colors and shapes. For me, I wanted to display the collection instead of losing them in never never land.

My first instinct was to hit the information superhighway for a bow holding bargain. I didn't see too many I liked and I surely didn't want to pay for shipping when I could possibly DIM (Do It Myself). 

This is the final product ...


What you need:

Wooden frame
Acrylic Paint
Ribbon
Glue gun and glue
Sawtooth picture hanger and hammer and nail
Bows or hair clips

Here's what I did:

1. I bought the unfinished wood frame (originally made to showcase scrapbook pages) at Hobby Lobby. It cost ONLY 10 dollars, but I got it for SIX dollars with a coupon! (By the way, Hobby Lobby has an App with coupons -- all you have to do is show the cashier your phone). The ribbon and paint came from JoAnn's craft store.

2. I painted the frame with the acrylic paint I already had in my craft supplies (less than a dollar).

3. I cut the ribbon into 10 strips to fit the back of the frame.

4. I measured and marked the back of the frame to make sure my ribbon pieces would be placed evenly.

5. I glued the ribbon to the back of the frame (weaving the ribbon on top and below each other to create a basket weaving pattern).

6. Added the sawtooth picture hanger and ... wha-la ... easy peasy!


The total cost of this DIY (or DIM) project is 10 dollars or less (depending on what you already have in your craft supplies).

Enjoy!

Kathryn


Follow Me on Pinterest

Sunday, July 22, 2012

Books for Less

I don't know about you, but I can't handle the pressure of checking out a book at the library and reading it before it's due back!

The deadline plain stresses me out ... especially when THIS mom should be catching up on the latest parent magazines (which are stacked up collecting dust) rather than reading a book that probably doesn't have any educational value to improve my life.

But, it's nice (every once in a while) to push away the laundry and escape from reality for a moment. I love reading, I just don't have the time like I used to have.

Buying books gives me the freedom to read it tonight, tomorrow or maybe even next summer. I am not a fan of what it costs to buy new books, so I was really happy to see the below sign hanging in my library.


What? Three dollars for two hardcover books and 50 pennies for small paperback books (or 3/$1)! 

What a deal! I felt like I was at a garage sale (minus the garage and the strangers hovering over my shoulder).


I found very popular books that were probably released years back, but who cares if you haven't read them, they are new to you! I left the library with at least three books for less than five bucks!

Now, I can put my buys on the nightstand and whenever the opportunity arises, I can crack one open and jump into another world (without worrying about when I need to finish the last chapter).

(Check your local library to see if they have books for sale. Some do daily sales and others may have a weekend events to raise money for the "Friends of the Library".)

Enjoy!

Kathryn


Follow Me on Pinterest